..of animating. Well, more like my favorite way of animating. I didn't invent it, I don't own it :P
It would be probably more useful if I would show it, but animating is slow business, so besides a quick blocking I don't know how I could make an animation tutorial worth a damn. Maybe one day I'll record something.. and speed it up a lot.
I like to approach animation in context, so if specific acting is required, Pose to Pose animation is probably the best tool. And even Pose to Pose can be approached in many ways, you can get from blocking to splines right away for example, which is what I do, I want to see a flowing rough animation, no matter how messy, and I'll try to fix the hips first, which starts to make animation look more grounded, less floaty, and gives the character weight. But if very specific stuff is needed, like in the salsa example on my reel [for that I used references heavily cuz I'm not a phenomenal salsa dancer.. like.. at all], Pose to Pose in a very traditional way works great. Meaning detailing the blocking as much as possible before going into splines.
I think no matter what approach you take though, animation magic happens at polish, and the difference between disaster and awesome-possum animation can simply be that: polish, enough time dedicated to massaging and detailing. Animation looks pretty bad until polish anyway, and has a chance to start looking alive at the very last stage. Which is why quick, rushed animation, normally has no chance of looking good. You really have to take the time and detail and massage every curve and every gesture.
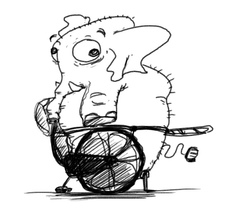
Sure blocking is essential, it's where you explore ideas, and if you start with a really messed up blocking, it's hard to fix it. It's like starting to draw a bicycle and in fact you wanted an elephant.. So now you try hard to change the bicycle to look like an elephant, but it's very likely that the elephant will end up looking a bit like a bicycle.. :P That said, in animation.. you CAN change a bicycle into an elephant. It's just not efficient.
It would be probably more useful if I would show it, but animating is slow business, so besides a quick blocking I don't know how I could make an animation tutorial worth a damn. Maybe one day I'll record something.. and speed it up a lot.
I like to approach animation in context, so if specific acting is required, Pose to Pose animation is probably the best tool. And even Pose to Pose can be approached in many ways, you can get from blocking to splines right away for example, which is what I do, I want to see a flowing rough animation, no matter how messy, and I'll try to fix the hips first, which starts to make animation look more grounded, less floaty, and gives the character weight. But if very specific stuff is needed, like in the salsa example on my reel [for that I used references heavily cuz I'm not a phenomenal salsa dancer.. like.. at all], Pose to Pose in a very traditional way works great. Meaning detailing the blocking as much as possible before going into splines.
I think no matter what approach you take though, animation magic happens at polish, and the difference between disaster and awesome-possum animation can simply be that: polish, enough time dedicated to massaging and detailing. Animation looks pretty bad until polish anyway, and has a chance to start looking alive at the very last stage. Which is why quick, rushed animation, normally has no chance of looking good. You really have to take the time and detail and massage every curve and every gesture.
Sure blocking is essential, it's where you explore ideas, and if you start with a really messed up blocking, it's hard to fix it. It's like starting to draw a bicycle and in fact you wanted an elephant.. So now you try hard to change the bicycle to look like an elephant, but it's very likely that the elephant will end up looking a bit like a bicycle.. :P That said, in animation.. you CAN change a bicycle into an elephant. It's just not efficient.
I used to give blocking too much credit though, I think now that the more time I have for detailing and massaging animation, the better it will be, and even if I start with a problematic blocking, I can cut and push and pull and fix it. I think that even if you are able to visualize really well, before starting to animate, you still have to change a lot of things after blocking. Maybe some amazing animators are able to just block things with incredible precision, I'm not one of those. I try to be flexible though and change timing and poses and anything necessary, at any stage. Although major performance changes are cheap in blocking, and expensive later. But significant visual changes can be made late as well, and polish, or massage.. is a phase that can start quite early in fact.
OK, enough philosophy, tutorial:
Layered Animation.
Or In Passes.
Or whatever you wanna call it.
Even Straight Ahead.. except it's not really Straight Ahead. It's more like.. Layered Straight Ahead.
It works well for action, and especially well for creatures, because animating quadrupeds or multipeds is quite tricky for us bipeds, we don't really feel that stuff as that creature would.. we don't even walk in all 4 very often. : ] I think this method makes the job much easier. I have no idea who first used it.. but I first tried it after reading a blog post by Shawn Kelly, one of the founders of Animation Mentor. I really like his animation rants a lot! He mentions it's not recommended for beginners, and I kind of agree.. but I think any animator should at least try it at some point. I'll talk at the end about the challenges and risks with this way of working.
Layer 1. I start with a pass on the hips, beginning to end, the whole thing.
I'm not talking about animation layers here btw, I'm just doing a pass on the hips controller alone.
I ignore the limbs [even hide them if I can]. I make sure the main body mass is roughly flowing well, with timing and weight that feel kind of right. It's a matter of visualizing at this stage, and trying to imagine what the final animation would look like. I don't worry about the tiny details though, I'll change things later. A lot.
Layer 2. I animate the chest. Sometimes in the same pass as the hips, especially for quadrupeds. I'm looking at the whole main body mass as one object that deforms. Like a sausage. Animating a floating/flying sausage is easy. So I might start with blocking hips and chest, and then spline them and clean things up and detail a bit, while keeping things simple.
Layer 3. Rough neck and head animation. This can be a later pass, it doesn't matter so much, unless you're doing an action-acting anim. Head movement is essential in acting, I think it's where most of the meaning comes from. Or even for simple action, if I want to see the line of action for the spine and its continuity.. which in itself can be the core of the performance, I add this pass early on.
Layer 4. I add basic steps. Again, everything is done is passes/layers, so I go from the beginning to the end of my anim. I just pose the feet roughly in place, in stepped mode [haha, the irony..]. So at this point the body flows in splines and the feet just snap from pose to pose. It's painful to watch. Don't let anyone look at it..
Layer 5. I add basic timing and linear interpolation for the feet. The feet now shuffle on the floor, or if you have complex terrain, they just blend between basic poses. At this point I'm thinking more about the feet pattern and timing.
Layer 6. I add up and down on the feet and further detail the legs/knees. I'm thinking of the pattern in more detail now that the basics are in place. At this point a quadruped can look quite presentable. Rough, but watchable.. and it didn't take too long to get to this point.
So far I've been dealing with basic locomotion, basically.. And at every stage I'm double-checking the entire performance, if major modifications are needed I'm doing that as early as possible. I'm trying to ignore the details [since animation looks so bad before polish, it's very tempting to want to fix details.. and I'm definitely guilty of doing this. But it's a waste of time at this point, you just have to trust that you'll be able to fix anything later and focus on the core elements of the performance].
Layer 7. For bipeds or.. anything with arms.. I'm adding rough arms anim. : ] The arms can follow the body or complement it or do whatever.. but it's really important that all the layers work together, as one performance. So a large arm gesture normally has to start with the body, so hips > chest > arm. The reverse can also be true, if someone pulls your arm, or you hit something, you have to propagate that motion through the body, starting with the impact origin. This is so important yet often missing in beginners' anims. I've seen animators trying to add more punch to an action by making it faster, but if you don't use the whole body to show effort and impact, the gesture will just be cartoony quick, lack weight, and look fake.
Layer 8. Rough Appendages. Like tails, long ears, whatnots.. a large/long/very visible tail can play a major part in the performance. So I'm looking at it as a continuation of the spine, creating an overall line of action.
Layer 9. Rough Face anim/expression. If any.. This can be done much earlier, for acting reasons. Like immediately after head movement. If head and face don't work together to create the right performance, it's best to change that early. On the other hand, it may be important to see a rough body performance first, and match the head and face to that. But then for acting.. Pose to Pose might be better, even including facial expression in the key poses. Depends. In any case, expression can't be an afterthought.
Layer 10. Lip Sync, if any. This can be done before facial anim. But for quality it's probably better to think of the performance first, and leave mechanical details like lip sync until after emotion is clearly established.
Btw I'm completely horrified that some people think lip sync and facial animation are kind of the same thing.. and especially that lip sync can be done with some default mouth shapes, ignoring expression. Lip sync is super easy to do, just hit the main mouth opening accents correctly and you already have rough lip sync that reads better than most lip sync ever done.. :P I think expression is much more important. So not the fact that you open the mouth, but HOW.
Layers 11-11111111. Polish. And that's it. : ]
I mean at this last stage in fact I spend most time, taking a rough performance and massaging it and detailing it and then massaging and detailing some more.
And how much polish is enough polish.. that depends on the project.
Well, I do mix these layers/passes/stages quite a lot sometimes, I might not finish work on the chest but I'll jump onto neck and head, or some tail, if the tail is an important part of the creature. Or I'll detail some areas more, just cuz they look too floaty and awful. Or with the feet I'll go between basic pattern anim and fixing poses or even a bit of popping knees, if I can fix a large chunk by just pushing the feet up or the hips down a bit. Also.. a bird or some super-weird creature from hell.. might have a slightly different order of execution. Like a flying bird would be body first, maybe head next.. or straight to wings. Although, for a bird, Pose to Pose might work better, posing the wings and the body in one pass. Except if I have a complex landing anim for ex, I could go with.. mostly layered? Tbh Pose to Pose and Layered anim are good friends in fact. I can have an initial Pose Blocking, and then go straight into splines and start polishing only the hips for the entire anim, only the chest, etc. In a way.. it's a natural part of Pose to Pose. The main difference with Layered is that I can start without a blocking [that doesn't mean 'without a plan'].
OK so the main problems with this method:
1. You might not be able to visualize properly and end up with unexpected crap after many hours of animating. Yeap. The more you animate like this and the better you are at visualizing, the easier it gets and the better the results. And you have to be confident enough that, if needed be, you can turn the bicycle into an elephant. So this is a fairly significant risk, especially in a production env.
2. You can't show a blocking [but you might be able to show rough animation fast enough, which can turn a problem into a major advantage]. If blocking is required.. Pose to Pose into eternity.
3. Things can end up looking separate, segmented, uncoordinated.. With a full IK rig the problem can become double-trouble. But that's often an issue in animation. You just massage things until they look right.
And the main advantages:
1. It's fast.
Because:
2. It makes complex action easy to handle.
3. You naturally focus on weight and flow instead of on shapes [which can be both good and bad].
[speaking of shapes though, you can add corrective poses, on a separate layer, if you need to hit a specific pose and you have a mess of keyframes at that point. Some apps, like Max and Maya, let you merge layers without baking and losing your keyframes. It's a fast, easy way to add changes to an animation, but it's not very clean; you might need to clean up your keyframes afterwards if anyone is worried about your anim being 'spotless'. If you work in a mocap env though, editing massive amounts of keyframes is daily routine, nobody will freak out about brutal animation edits of all kinds..]
 RSS Feed
